Thursday, December 29, 2011

Color Space Question

I received this email question from Mike, a student in my last Lightroom class:  "Would it be better to use the Adobe color setting on the camera vs. the SRGB setting if everything is processed thru Lightroom?

Mike"

My reply:

Adobe LR and PS can handle each color setting equally well, from what I understand about it. Adobe 1998 and ProPhoto settings actually have the ability to show more colors or a wider range of colors than sRGB but I've never been able to tell the difference between the setting in any of my pictures though.

From what I have read, most of the top-notch pros use the ProPhoto setting although my Canon cameras don't have it available as an option.

I think the most important thing is to have the camera and all software settings the same. Every time you change the color space you may lose some information.

The problem I've had with Lightroom and less with Photoshop is that my prints tend to run darker than my monitor shows them. I do have a calibrated monitor so I'm reasonable sure that it is correct. I have to do some test prints, usually in 4x6 before I attempt to print any large prints.

In experimenting to address this issue, I tried all of the color space settings and nothing helped. I have read books by different experts, particularly Scott Kelby, who I feel may be the best writer on the LR and PS topics. His advice is to set the print settings in the software and in the printer dialog box to call for the Application Managing the color. I never had success with this. I experimneted with every option and combination I could find and now I use the Printer Manages Color setting and have good luck with it. For information, I have an HPb 9180e model printer. Other models or brands may require different settings.

Bottom line, I think Adobe products are adept at handling each Color Space option. Just be aware of the differences in color ranges between the options.

Thanks for the question, I hope this helps.

Wednesday, December 28, 2011

Don't do what I did!

Newer Canon cameras have the option of taking a picture without a memory card in the camera.  This is a selectable option which I had foolishly set to allow. 

I had a recent opportunity to shoot some portraits but I failed to put the memory card into the slot!  Now, let me tell you that my standard practice is to upload all images to my computer, unusally the same day I shoot them.  I then put the card(s) back into the camera and re-format them.  I then leave a card in the camera so I'm ready to go when needed. 

But this time I didn't follow my normal protocol and wound up shooting several images without a card.  I didn't realize this until much later and then further discovered that these images are not stored in any temporary memory so they were lost!  (at least I haven't found a way to retrieve them)

Fortunately, I was equipped that day with two cameras and had used both.  Of course the images weren't the same as I was using two different focal length lenses but at least the day wasn't lost.

Needless to say, I immediately changed that option to not allow the camera to operate withour a memory card!

Happy shooting!

Saturday, December 17, 2011

Making Images versus Taking Images

To act like I really know what I'm doing photographically, I'm going to quote Ansel Adams.  Adams said (paraphrasing) "you don't take good photographs, you make them."

I have taken that advice to heart and will go to great lengths to try to "make" a good photo.  I have 4 cameras, not counting iPhone and iPad cameras, loads of lenses, filters, lights, radio-controlled remotes, etc.I have a really nice tripod along with a mono-pod, a monster clamp etc. to put myself in the position to "make" an image.

I spend hours in blinds waiting for birds to put themselves just right for me to take their picture.  I travel long distances to be in the right place at the right time to "make" the right image.

Then I put the image on my computer and manipulate it with Lightroom and Photoshop in search of my own Adams-like image.

But...and you knew there would be one, right?  Some of the best images I have "made, " came at a point when no preparation was possible other than having a camera handy.

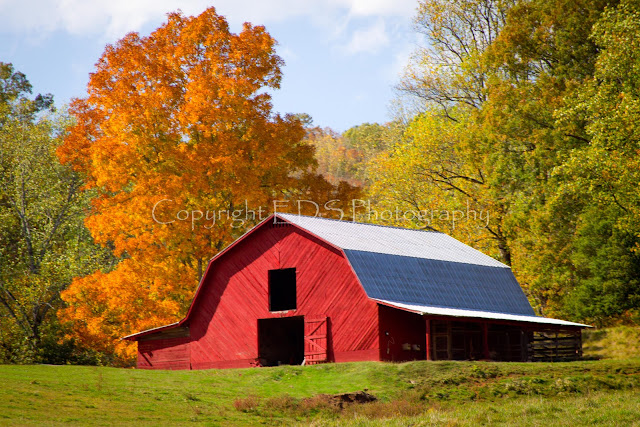
this image is a perfect example.  Mary and I were on a train in the North Carolina mountains, mostly riding through woods with an occasional glimpse at a mountain vista or a farm house or creek.  So it was in this state, combined with a rocking train, fighting sleep, that I looked to my right and saw the barn that became the image below.  I had time to raise my camera to my eye, try for the best composition and press the shutter button, all in a matter of 5 seconds before my view was again of woods.  A slight crop in Lightroom, some minor PS adjustments, and this is what I "made."


Image taken with Canon 7D, EF 28-135mm, at 127mm,   at f/7.1, 1/250 sec ISO 200

This image is maybe an even better example of serendipity at work.  It was taken from a moving car with an iPhone!  Again, in the North Carolina mountains, this time in late December 2010, following an impressive snow-fall, my son and I were driving down the highway when the barn appeared.  I had my phone in my hand so I handed it to Jonathan and directed "shoot it!"  We weren't able to slow or stop so the image "made" is what you see (later cropped in Lightroom.)  I returned the next day with my cameras but the sky was different and, although I made some good images, none quite compared to this one.


Taken with Apple  iPhone 4, Exposure 1/2000 at f/2.8, ISO 80

The morale of my story is that one should make every effort to "make" a photograph but should never forego shooting when the opportunity presents, even if preparation is not possible.  Great images can be "made" that way too!

Sunday, November 20, 2011

Show or No Show?

Friend and fellow photographer Nicole Lami recently emailed me to ask for advice in dealing with a question we all face at one time or another.  Her question, paraphrased, centers around a recent shoot after which Nicole chose her best images and presented those to the client.  The client, however, wanted to see all the images captured during the shoot.  Nicole wanted to know how I would handle this situation.

My response was NO! don't do it!

Now for my logic:

The reason clients choose one photographer over another is their confidence that the chosen one has the talent to produce the type of images desired.  In a photo shoot, we all will get a few shots that are immediate throw-aways for a variety of reasons, flash didn't fire, focus was off, etc.  Then there are the situations where we have tried a pose with the client that simply didn't work.  These images do not capture the client in their best nor do they show the photographer at their best.  To show an image  like this to a client may lead them to having doubts about the quality of all the images and your ability as a photographer..

There are some images that belong in the good-to-great category but may a little retouching before presentation.  I will make preliminary edits to those before I show them.  This takes time on images that may not sell but I don't want to have the client turned-off by an image that takes little effort to fix to make it marketable.

My problem is that I tend to show the client too much. I've learned that this tends to confuse the client and actually reduces sales rather than increasing.   Sales then tend to be "I want a 4x6 of each of them!"

How would you have answered Nicole's question?

Friday, November 11, 2011

Laziness!

I attended a hospital-related function and encounter Martha Davidson, a professional photographer friend and student in my Lightroom class.  She promptly chastised me for not being diligent about the blog!  I am so grateful that she did because it means that someone was reading my elaborations! 

So, I promised to do better from now on and I will do so.

To the meat of today's blog:  I found a website that has some of the most compelling photographs I've ever seen.  The website:  http://www.milkphoto.com/ is a gallery of photos showing Moments of Intimacy, Laughter and Kinship, thus M.I.L.K.  Take a look and be inspired!


I have singed up to conduct another Introduction to Lightroom class with the USA School of Continuing Education.  If you know of anyone who may benefit from the class, please let them know.  The schedule should be published in the next couple of weeks.

Thanks Martha for inspiring me again!

Thursday, August 11, 2011

TV shows of Interest to the Photographer

I have found two photography related shows on television that I truly enjoy and have learned a great deal from and want to share with my fellows shutterbugs.

The first is a PBS show that shows on Alabama public tv at least four times each week. WILD PHOTO ADVENTURES is hosted by photographer Doug Gardner from South Carolina and features his ventures into the great outdoors to photograph wild life, landscapes and the flora of the region. He works in a number of tips to us shooters during each episode and shows stunning results of the shutter clicks. The best part, he's from the south so he talks like us!

The first opportunity to see each weeks new episode is on Saturday afternoon at 4 pm.

You can find episodes from the last three seasons at www.wildphotoadventures.com.

The second show is on, believe it or not, The Weather Channel! Host Peter Lik takes viewers around the world to find the perfect landscape shots. He produces some of the most unique images I have seen. His show is not so much for the photographer in that the still images don't display his settings or equipment. Best I can tell he uses very expensive large format cameras. He feature then weather in a region and how it affects his photography so it is well worth a shooters time to watch.

He is a native of Australia so, needles to say, he doesn't talk like us! Image the crocodile hunter with a Haselblad! High energy with a lot of arm motions while talking.

This show can be found on the Weather Channel, Thursday evenings at 8 pm Central. Look for FROM THE EDGE WITH PETER LIK. More on Peter Lik can be found at, you guessed it, peterlik.com.

Enjoy and let me know what you think.

Friday, July 15, 2011

Exporting To CD/DVD from Lightroom

This post is in response to a question presented by a reader who asked what's the best way to export to a CD/DVD from LR.  The simple answer is:  just the same as you export to the hard drive.  But the long winded answer necessary to fill space on this blog is:  there is a difference in how you do that!  burn to a cd/dvd is a little bit longer process than simply  burning to the hard drive.

Let me point out first that this option is not available in the 64-bit version of LR, only the 32-bit version.  This is true in LR 3, I'm not sure about previous versions.


As you select EXPORT from the lower left portion of the screen in the LIBRARY module (or from the File option on the tool bar), you will get this window:


Please note the pull-down box with the destination options were opened for this blog and will usually only display the current selection You'll have to click to open the pull-down menu.

After selecting the CD/DVD option and making any other selections you need to make prior to exporting, choose the EXPORT button near the bottom right of the window.

This will pull up this window:


As may be obvious, this is where you select the drive to which the files will be exported.  Many computers have multiple CD or DVD burners and here's where you make your choice along with selecting the burn speed.

 Next this window will appear:


This is your chance to label the CD/DVD.  Enter the label or simply select CONTINUE.


LR will then show on the top left portion of the screen this indicating that the files are being prepared before writing them to the disk.


Then, the last step, the files will be burned to the disk.


After this process is complete, LR will return you to the LIBRARY module.

If you are using a 64-bit version of LR, forget the above!  Simply EXPORT the files to a location on your hard drive and then later copy them to a CD/DVD using Windows or your Apple operating system's file handling features.

As always, I hope this helps!  Let me know if you have any questions.

Wednesday, July 6, 2011

My Visit to the Windy City

I'm back sports fans, after an extended hiatus!

Part of the hiatus was due to a trip I took to Chicago to attend a meeting related to my day job.  I wasn't particularly looking forward to this meeting, mostly because I don't consider myself to be a big city kind of guy, whatever that means.  The last meeting of this organization I attended was held in Santa Fe New Mexico which is a mecca for photographers.  I didn't view Chicago this way and didn't even want to take a camera.

But, what is a photographer without a camera, so I decided to make the effort to carry a camera and a couple of lenses on the off-chance that I would get an opportunity to get some images of the concrete jungle.

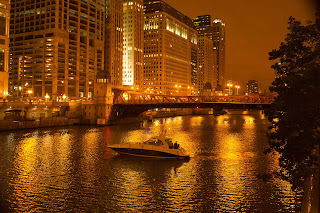
And am I ever glad I took it!  It turned out to be a great opportunity for photography and some different kinds of images for me.  Certainly most of my images turned out to be skyline and architectural but, let's face it, skyline images done right can be awe inspiring.

A cruise on the Chicago River was the perfect place to capture the buildings and skyline.  The last leg of the cruise took us right out to the opening into Lake Michigan and far enough away that I was able to capture images for a panorama that I love:
And the ever-popular Willis tower (formerly the Sears Tower):


A late night walking excursion along the river gave me an opportunity to try some new tricks and get the images below:


The trick about the night shots?  Set your camera's white balance to shade.  It makes the images more golden than it probably would be but makes the image more desirable in my opinion.

If anyone is interested in how to do the panorama stitched shot, let me know and I'll blog it!

Later!

Tuesday, June 14, 2011

Performing Backup While Importing

Let's pick up close to where we left off on the last post about importing.  this time we'll discuss how to back up during the import process and I'll describe the equipment I use for this purpose.

Remember in the last blog I mentioned that you select the IMPORT option on the lower left part of the screen in the LIBRARY  module.  Once the new screen is visible, if you have selected COPY or MOVE as the option for importing, the screen below will be visible in the top right portion of the window.
If you want to make a copy as the files are imported, you will check the "Make a Second Copy To:" option.

Please notice that there is a down-facing arrow to the right.  If you click on this you will see a list of your last used folders for back up.  It will look like this:
If you want to use one of these folders to house your back up files, simply select it with your mouse.

However, if you want to create a new folder of the  back up, you will click on the light gray text listing the last used folder.  In my example above, the text says: "G:\Evacuation Drill".  Once this is selected, you will see this:
Look familiar?  It should, it's the standard window that opens for you to select a folder or in our case, make a new one.  To do so, select:  you guessed it!  Make New Folder!!  Once this is done,  you should see something like this:
Note that the New folder will be  shown with a blue background, indicating that you can change the name of this folder at this point.  Simply type the name of the folder you want to create.  Once that is done, press enter twice.  The first time renamed the folder and the second  completed the process of making a new folder.

Once this is done and you have completed the process in the last blog, you can select IMPORT at the bottom right of the window and the process will begin!!

Let me further describe my process.  I shoot onto CF cards, that's what my cameras take.Whether you are using CF, SD, micro SD or any other medium, the process is the same.  My CF card goes into the card reader built into my computer.

If you don't have a card reader built in, there are several options.  One, buy a USB card reader.  They are available from a variety of sources for not much money.  This one can be found here:  http://www.bhphotovideo.com/c/product/735302-REG/Lexar_LRW024URBNA_Multi_Card_24_in_1_USB_Reader.html


 Alternately, you should be able to connect your camera via USB cable to your computer and use it as a reader.

For a back up system, I use an external device that allows you to read and write to hard drives and change the drives as you want.  The device is a docking station:
Instead of buying expensive, dedicated external hard drives, with this device I can buy regular hard drives that are designed for internal use but place them in this docking station and they serve as an external hard drive.  My older files are on one hard drive and my current files are being backed up to a 500 GB drive that costs less than $50 while dedicated external hard drives tend to cost 20 to 30% more.

The Blac X docking station can also be connected to the computer via SATA connection and is much, much faster than USB.

OK, that's it for tonight.  Next time:  Adding Keywords to imports!

See you then!

Wednesday, June 1, 2011

Importing into Lightroom

I came to realize  that the most difficult thing for folks to grasp is the process for importing images into Lightroom.  So, over the next few posts, I will run through this process again and offer details and PICTURES!  Hint: this is the point at which you are to be excited!

This blog will cover importing from a camera or camera card.  I will cover the others later.

First step:  hook camera to computer per your manufacturer's instructions or insert your camera memory card into the computer's card reader.  From the LIBRARY module, select Import (lower left panel).  There are two other ways to import:  1.  Select FILE>IMPORT PHOTOS, or 2. Ctrl+Shift+I

A new screen will appear with this bar across the top:

Notice the selected option Copy is highlighted.  This option copies the file from the source onto your harddrive AND adds the photos to the LR catalog.  Copy as DNG will do the same thing but will convert the file format to DNG, Adobe's raw image format.

Move does exactly what it says, moves the file from its current location to the harddrive or to another folder on the harddrive AND it adds the photos to LR catalog.

Add option only adds the photos to the catalog without moving or copying them.

I learned tonight that the only options available when using a camera or camera card are the Copy and COpy as DNG options.  I told y'all I'd learn from you too!

Once an option has been selected it's time to tell LR where to put it!  The right panel gives us more options to choose.  Remember this?

This is where we define the destination of our photos.  Most often, you will want to copy the pictures to the My Pictures folder.  However, you will want to make a sub-folder with a name that will allow you to find the photos later.  You will notice in this screen capture that there are a lot of dates showing for folder names.  this is the way I used to do things before I came to realize that I couldn't remember when I shot pictures!  I needed to use descriptive names for the folders instead.  

By placing your cursor on the My Pictures line and right-clicking, a new window will pop up where you will select Create New Folder.  Then this window will appear:
Click on My Pictures to highlight it, then select Make New Folder from the bottom of the window.


This window will open and your cursor will be in the New Folder line.  Type your desired name for the folder.  Once that is done, hit ENTER, then select OK and you will return to LR.  The folder you just created will be selected for you to copy the new photos into.

One thing that is new for you:  If you are importing images into a single folder that were captured on different days, you have the option of saving them into different sub-folders by date of capture:


Notice the option of Into Sub-Folder and the pull-down menu below it.  Shown here is the Into one folder option.  The other option of sub-folders by date is illustrated below:

You must check the box by the Into Subfolder line before either of these options is active.  To further complicate things, you then have to decide the format of the date you want displayed!

I think that's enough for one night.  Next we will cover how to back up the files as you are importing them.

Now don't be tempted to print all this off so you will have it for future reference, although if you insist, I don't care.  But, this blog will be archived and can be accessed for years to come (if interest keeps up and I can maintain it!).

Spread the word to your friends who may be interested in learning LR or other aspects of photography.  As long as there is an interest, I will keep doing it!

Please feel free to make comments and let me know if this is too simple an approach or if this is what you want.  AND,  ask questions.  That way we can all learn.
Tuesday, May 31, 2011

Camera Obscura in the 21st Century

In Camera, Lights, Digital I, Walter Bower teaches the history of photography which began many centuries ago with the camera obscura, or darkened room.  Over the years the camera obscura was used to cast an image onto paper where it was traced until someone figured out how to expose the image onto a a silver covered plate, thus a permanent "photographic" image was preserved. 

Now, camera obscura takes on a new dimension with the work of artist Abelardo Morell which can be seen here:  http://www.abelardomorell.net/

Enjoy the art then  try your own version!

Saturday, May 28, 2011

In Memory

In my years of photography,I have taken 10's of thousands of pictures with maybe a few hundred being put to any good use.  My images hang on walls, sit in frames on tables, grace the screens of computers as desktop or screen saver images.  Some pictures get public attention while most are rarely seen outside the owners home or office.

Every time I see one of my images being used or displayed, I am flattered.   That's what I wanted when I pushed the shutter button but I'm still surprised to see them displayed.

A few years ago, I was asked to take photographs to be used in the directory for my small church.  I agree since it gave me an excuse to buy studio lights, backgrounds, stands etc.!  Soince there was no money for me  in this, it gave me a lot of experience.  The pictures were taken, the directory printed and I haven't thought much about it since then.

Today, I attended a memorial service for one of those church members and friend, Johnnie Carl Grimes, Sr.  On the cover of the program for the service was a picture of Johnnie, the one I took those few years ago.  The picture was cropped by someone to show only Johnnie's face but I knew it was mine.

Now this was not an award winning image.  It was actually  more of a snapshot than a work of art.  And it was probably the last portrait he had made in his long life.  But for whatever reason, his family chose to put it on the cover of the program, a program that I know his sons and their children and  grandchildren took home and put in a scrap book or in the family Bible as a remembrance of Johnnie and his life and death.

Johnnie and his wife Daisy have had an impact on many lives over their years, me included.  To see my work playing this role, made me very proud and very flattered.

My image was not special, but Johnnie was.  Goodbye old friend, we'll miss you.

Johnnie Carl Grimes, Sr.

Friday, May 27, 2011

Intro to Lightroom version 1.0 DONE!

Last night marked the culmination of my first class in Lightroom for the USA Special Courses.  I had a great time with a wonderful group of participants and I hope they learned as much as I did!

This class is the inspiration for this blog.  I found that I couldn't cram all the info I wanted to share into the time allotted for the class. Additionally, I find I remember stuff at home that I wanted to cover but missed!

I also found that I have some basic photgraphy info that I want to share and I think readers will find helpful.

Having said all that, thanks for visiting the first ever blog posting and I hope you'll return for many more!

Elmer